Introduction
Applying eyeliner can enhance the shape and definition of your eyes, creating a bold and dramatic look. Whether you prefer a subtle line or a more intense winged effect, mastering the technique of applying eyeliner can take your eye makeup to the next level. In this guide, we will explore the step-by-step process of applying eyeliner to help you achieve a flawless and professional finish.
Different Types of Eyeliner and How to Choose the Right One
Eyeliner is a staple in many people’s makeup routines. It can enhance the eyes, create a dramatic look, or simply add definition. However, with so many different types of eyeliners available on the market, it can be overwhelming to choose the right one. In this article, we will explore the various types of eyeliners and provide tips on how to choose the perfect one for your desired look.
One of the most common types of eyeliners is pencil eyeliner. Pencil eyeliners are easy to use and provide a more natural look. They come in a variety of colors and are great for beginners. To apply pencil eyeliner, simply sharpen the pencil and gently glide it along the lash line. You can create a thin line for a subtle look or build it up for a more intense effect. Pencil eyeliners are also great for smudging, allowing you to create a smoky eye look effortlessly.
Another popular type of eyeliner is liquid eyeliner. Liquid eyeliners provide a more precise and defined line. They are perfect for creating winged eyeliner or a cat-eye look. Liquid eyeliners usually come with a fine brush or felt-tip applicator, which allows for more control during application. To apply liquid eyeliner, start from the inner corner of the eye and draw a thin line along the lash line, gradually thickening it towards the outer corner. It may take some practice to master the technique, but the results are worth it.
If you prefer a softer and more subtle look, gel eyeliner might be the right choice for you. Gel eyeliners come in a pot and are applied with a brush. They offer a creamy consistency that glides smoothly onto the eyelids. Gel eyeliners are highly pigmented and long-lasting, making them ideal for all-day wear. To apply gel eyeliner, dip the brush into the pot and draw a line along the lash line. You can also use a thin brush to create a winged or smoky effect.
For those who want a hassle-free application, there are also eyeliners in the form of pens or markers. These types of eyeliners are perfect for on-the-go touch-ups or quick makeup routines. They usually have a felt-tip applicator that allows for easy and precise application. Simply glide the pen or marker along the lash line to create your desired look. These eyeliners are great for beginners or those who are always on the move.
When choosing the right eyeliner, consider factors such as your desired look, skill level, and personal preference. Pencil eyeliners are versatile and beginner-friendly, while liquid eyeliners offer precision and drama. Gel eyeliners provide a creamy texture and long-lasting wear, while pen or marker eyeliners are convenient and easy to use. Experiment with different types of eyeliners to find the one that suits you best.
In conclusion, there are various types of eyeliners available, each with its own unique qualities. Pencil, liquid, gel, and pen eyeliners all offer different application techniques and effects. Consider your desired look and skill level when choosing the right eyeliner for you. Remember, practice makes perfect, so don’t be afraid to experiment and have fun with different types of eyeliners. With the right eyeliner, you can enhance your eyes and create stunning makeup looks.
Step-by-Step Guide for Applying Eyeliner on the Upper Lid
Eyeliner is a versatile makeup tool that can enhance the shape and definition of your eyes. Whether you prefer a subtle, natural look or a bold, dramatic one, mastering the art of applying eyeliner is essential. In this step-by-step guide, we will walk you through the process of applying eyeliner on the upper lid, ensuring that you achieve a flawless and professional finish.
Before you begin, make sure you have all the necessary tools at hand. You will need an eyeliner pencil or liquid eyeliner, a steady hand, and a mirror. It’s also a good idea to have some cotton swabs and makeup remover nearby in case you make any mistakes.
Start by preparing your eyelid. Ensure that it is clean and free from any oil or residue. You can use a gentle cleanser or makeup remover to cleanse the area. Once your eyelid is clean, apply a thin layer of eyeshadow primer or foundation to create a smooth base for the eyeliner.
Next, choose the type of eyeliner that you are most comfortable with. If you are a beginner, an eyeliner pencil may be easier to control. If you prefer a more precise and intense look, opt for a liquid eyeliner. Whichever type you choose, ensure that it is sharp and in good condition.
Now, it’s time to start applying the eyeliner. Begin at the inner corner of your eye and work your way outward. Use short, light strokes to create a thin line along your upper lash line. If you want a more dramatic look, you can gradually thicken the line as you move towards the outer corner of your eye.
To create a smooth and even line, it’s important to keep your hand steady. Rest your elbow on a flat surface to provide support and minimize any shaking. If you find it difficult to draw a straight line, you can use small dots or dashes and then connect them to form a continuous line.
Once you have applied the eyeliner, take a step back and assess the symmetry. If one eye looks thicker or longer than the other, use a cotton swab dipped in makeup remover to correct any mistakes. Gently erase any excess or uneven lines until both eyes look balanced.
To complete the look, you can choose to apply mascara to your lashes. This will further enhance the definition of your eyes and create a more polished appearance. Make sure to let the eyeliner dry completely before applying mascara to avoid smudging.
Finally, remember to remove your eyeliner at the end of the day. Use a gentle makeup remover or cleansing oil to dissolve the product and wipe it away with a cotton pad. It’s important to remove all traces of eyeliner to keep your eyelids clean and prevent any potential irritation or infection.
In conclusion, applying eyeliner on the upper lid is a skill that can be mastered with practice and patience. By following this step-by-step guide, you can achieve a flawless and professional look. Remember to choose the right type of eyeliner, keep your hand steady, and correct any mistakes along the way. With time, you will become more confident in your ability to apply eyeliner and create stunning eye makeup looks.
Tips and Tricks for Creating a Winged Eyeliner Look
Eyeliner is a versatile makeup tool that can instantly enhance your eyes and create a dramatic look. One popular eyeliner technique is the winged eyeliner, which adds a subtle flick at the outer corner of the eye. This article will provide you with some tips and tricks to help you master the art of applying winged eyeliner.
Before you begin, it’s important to choose the right eyeliner product. There are various types available, including pencil, gel, and liquid eyeliners. Liquid eyeliners are often preferred for creating a precise winged look, as they offer more control and a sharper line. Once you have your preferred eyeliner, it’s time to start applying.
Start by preparing your eyelids. Ensure they are clean and free from any oil or makeup residue. This will help the eyeliner adhere better and last longer. You can use a makeup remover or a gentle cleanser to cleanse your eyelids thoroughly.
Next, apply an eyeshadow primer or a light layer of foundation to your eyelids. This will create a smooth base for the eyeliner and help it stay in place throughout the day. Allow the primer or foundation to dry completely before moving on to the next step.
Now it’s time to create the winged effect. Start by drawing a thin line along your upper lash line, starting from the inner corner of your eye and extending towards the outer corner. Use short, light strokes to ensure a steady and even application. If you’re new to winged eyeliner, it’s best to start with a thin line and gradually build up the thickness.
Once you reach the outer corner of your eye, imagine a line extending from the lower lash line towards the end of your eyebrow. This will serve as a guide for the wing. Using the same eyeliner, draw a diagonal line from the outer corner of your eye towards the imaginary line you just created. The length of the wing is up to you, but it’s generally recommended to keep it subtle and not too long.
Now, connect the wing to the rest of your eyeliner by drawing a thin line along your upper lash line. Make sure the line is smooth and continuous, without any gaps or bumps. If you make any mistakes, don’t worry. You can use a cotton swab dipped in makeup remover to clean up any smudges or uneven lines.
To complete the winged eyeliner look, you can also apply eyeliner to your lower lash line. This will help balance out the overall appearance and make your eyes appear more defined. However, be careful not to make the lower eyeliner too thick or heavy, as it can overpower the winged effect.
Finally, finish off your winged eyeliner look with a coat of mascara to add volume and length to your lashes. Curl your lashes beforehand for an extra lift. You can also apply false lashes if you want to further enhance the drama.
Remember, practice makes perfect when it comes to applying winged eyeliner. Don’t be discouraged if you don’t get it right the first time. With time and patience, you’ll be able to create flawless winged eyeliner looks that will make your eyes pop. So, grab your eyeliner and start experimenting with different techniques to find the one that works best for you.
How to Apply Eyeliner on the Lower Lid for a Defined Look
Eyeliner is a versatile makeup tool that can instantly enhance your eyes and give you a defined look. While applying eyeliner on the upper lid is a common practice, many people struggle with applying it on the lower lid. However, with a few simple steps and the right technique, you can easily achieve a flawless lower lid eyeliner application.
Before you begin, make sure you have the right tools. A good quality eyeliner pencil or gel liner, a small angled brush, and a steady hand are essential for this task. Additionally, it’s important to choose a shade that complements your eye color and overall makeup look.
To start, ensure that your lower lid is clean and free of any makeup residue. This will help the eyeliner adhere better and prevent smudging. If you prefer, you can apply a light layer of eyeshadow or primer to create a smooth base for the eyeliner.
Next, gently pull down your lower lid to expose the waterline. The waterline is the area between your lashes and your eye. It’s important to be gentle while doing this to avoid any discomfort or injury to your eye.
Now, take your eyeliner pencil or gel liner and start applying it to the waterline. Begin from the inner corner of your eye and move towards the outer corner. Use short, light strokes to ensure a precise application. If you prefer a more intense look, you can apply a second layer of eyeliner.
Once you have applied the eyeliner to the waterline, it’s time to move on to the lash line. This step will help define your eyes and make your lashes appear fuller. Using the same eyeliner pencil or gel liner, carefully draw a thin line along your lower lash line. Start from the outer corner and work your way towards the inner corner, staying as close to the lash line as possible.
If you want to create a more dramatic look, you can extend the line slightly beyond the outer corner of your eye. This will give your eyes a winged effect. However, be careful not to make the line too thick or heavy, as it can overpower your eyes and make them appear smaller.
To smudge or not to smudge, that is the question. Smudging the eyeliner can create a softer, more smoky look. If you prefer this effect, use a small angled brush to gently smudge the eyeliner along the lash line. This will help blend the color and create a seamless transition.
Finally, complete your lower lid eyeliner look by curling your lashes and applying mascara. Curling your lashes will open up your eyes and make them appear more awake. Apply a coat or two of mascara to add volume and length to your lashes, completing the overall defined look.
In conclusion, applying eyeliner on the lower lid for a defined look is not as challenging as it may seem. With the right tools, technique, and a steady hand, you can easily achieve a flawless application. Remember to be gentle, start from the inner corner, and stay close to the lash line. Whether you prefer a subtle or dramatic look, mastering the art of lower lid eyeliner application will undoubtedly enhance your overall makeup look.
Smokey Eye Makeup Tutorial with Eyeliner
The smokey eye makeup look is a classic and timeless choice that can instantly elevate your overall appearance. One key element in achieving this sultry and dramatic look is the application of eyeliner. When done correctly, eyeliner can enhance the shape of your eyes and add depth to your overall makeup. In this tutorial, we will guide you through the steps of applying eyeliner to create a stunning smokey eye look.
Before you begin, it is important to gather all the necessary tools and products. You will need an eyeliner pencil or gel liner, an angled brush, and a smudging brush. Additionally, make sure your eyelids are clean and free of any oil or residue. This will ensure that the eyeliner adheres properly and lasts longer.
To start, take your eyeliner pencil or gel liner and begin by drawing a thin line along your upper lash line. Start from the inner corner of your eye and gradually extend it towards the outer corner. The line should be as close to your lashes as possible, creating the illusion of fuller lashes. If you prefer a more intense look, you can make the line slightly thicker.
Next, it’s time to create the smokey effect. Using your angled brush, gently smudge the eyeliner line you just created. This will soften the harsh edges and create a more blended look. Make sure to blend the eyeliner upwards towards your crease, gradually fading it out. This will create a gradient effect, with the eyeliner being more intense near the lash line and gradually fading as it reaches the crease.
Once you have achieved the desired smudged effect, it’s time to move on to the lower lash line. Take your eyeliner pencil or gel liner and apply a thin line along your lower lash line. Start from the outer corner and work your way towards the inner corner. Make sure to connect the lower lash line with the upper lash line at the outer corner, creating a seamless look.
To intensify the smokey effect, use your smudging brush to gently smudge the lower lash line. This will create a more cohesive look and prevent any harsh lines. Remember to blend the eyeliner downwards towards your lower lash line, creating a gradient effect similar to the upper lash line.
To complete the smokey eye look, apply mascara to your lashes. This will further enhance the appearance of fuller lashes and add the finishing touch to your overall makeup. You can also opt to apply false lashes for a more dramatic effect.
In conclusion, applying eyeliner is a crucial step in achieving a stunning smokey eye makeup look. By following these steps and using the right tools, you can create a sultry and dramatic effect that will surely turn heads. Remember to start with a clean canvas, draw a thin line along your upper lash line, smudge it for a blended effect, and then apply eyeliner to your lower lash line. With practice and patience, you will master the art of applying eyeliner and create mesmerizing smokey eye looks.
Common Mistakes to Avoid When Applying Eyeliner
Eyeliner is a popular makeup product that can enhance the eyes and create a dramatic look. However, applying eyeliner can be a tricky task, and many people make common mistakes that can ruin their overall makeup look. In this section, we will discuss some of the most common mistakes to avoid when applying eyeliner.
One of the most common mistakes people make when applying eyeliner is using the wrong type of eyeliner. There are various types of eyeliners available, including pencil, liquid, and gel. Each type has its own advantages and disadvantages, so it’s important to choose the one that suits your needs and preferences. Pencil eyeliners are great for beginners as they are easy to control, while liquid eyeliners provide a more precise and intense line. Gel eyeliners offer a long-lasting and smudge-proof finish. By choosing the right type of eyeliner, you can avoid the mistake of using a product that doesn’t work well for you.
Another mistake to avoid is applying too much eyeliner. Many people think that the more eyeliner they apply, the better it will look. However, this is not the case. Applying too much eyeliner can make your eyes appear smaller and give a heavy, unnatural look. It’s important to apply eyeliner in thin, precise lines to enhance the shape of your eyes without overpowering them. Start with a thin line and gradually build it up if you want a more intense look. Remember, less is often more when it comes to eyeliner.
Not using a primer or base is another common mistake when applying eyeliner. A primer or base helps to create a smooth canvas for the eyeliner and ensures that it stays in place throughout the day. It also prevents smudging and fading. Before applying eyeliner, make sure to apply a thin layer of primer or a neutral eyeshadow to your eyelids. This will help the eyeliner adhere better and last longer.
One mistake that can ruin your eyeliner look is not properly sharpening your pencil eyeliner. Dull eyeliner pencils can create a messy and uneven line, making it difficult to achieve a precise look. Before applying pencil eyeliner, make sure to sharpen it to a fine point. This will allow for better control and a more defined line. If you’re using a gel or liquid eyeliner, ensure that the brush or applicator is clean and in good condition to avoid any smudging or clumping.
Lastly, not considering your eye shape when applying eyeliner is a mistake that many people make. Different eye shapes require different eyeliner techniques to enhance their natural beauty. For example, if you have round eyes, applying eyeliner only on the lower lash line can make your eyes appear smaller. Instead, try applying eyeliner on both the upper and lower lash lines to elongate the eyes. If you have hooded eyes, avoid applying thick eyeliner on the upper lash line as it can make your eyes look heavy. Instead, opt for a thin line or a winged eyeliner look to lift and open up your eyes.
In conclusion, applying eyeliner can be a challenging task, but by avoiding these common mistakes, you can achieve a flawless and professional-looking result. Remember to choose the right type of eyeliner, apply it in thin, precise lines, use a primer or base, sharpen your pencil eyeliner, and consider your eye shape when applying. With practice and patience, you’ll be able to master the art of applying eyeliner and create stunning eye makeup looks.
Conclusion
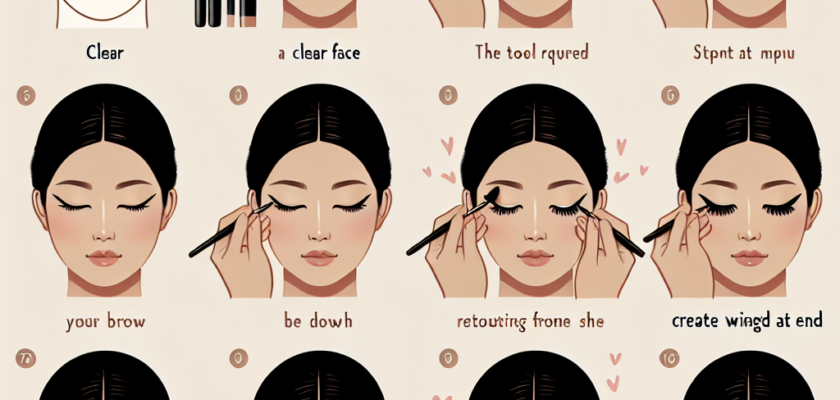
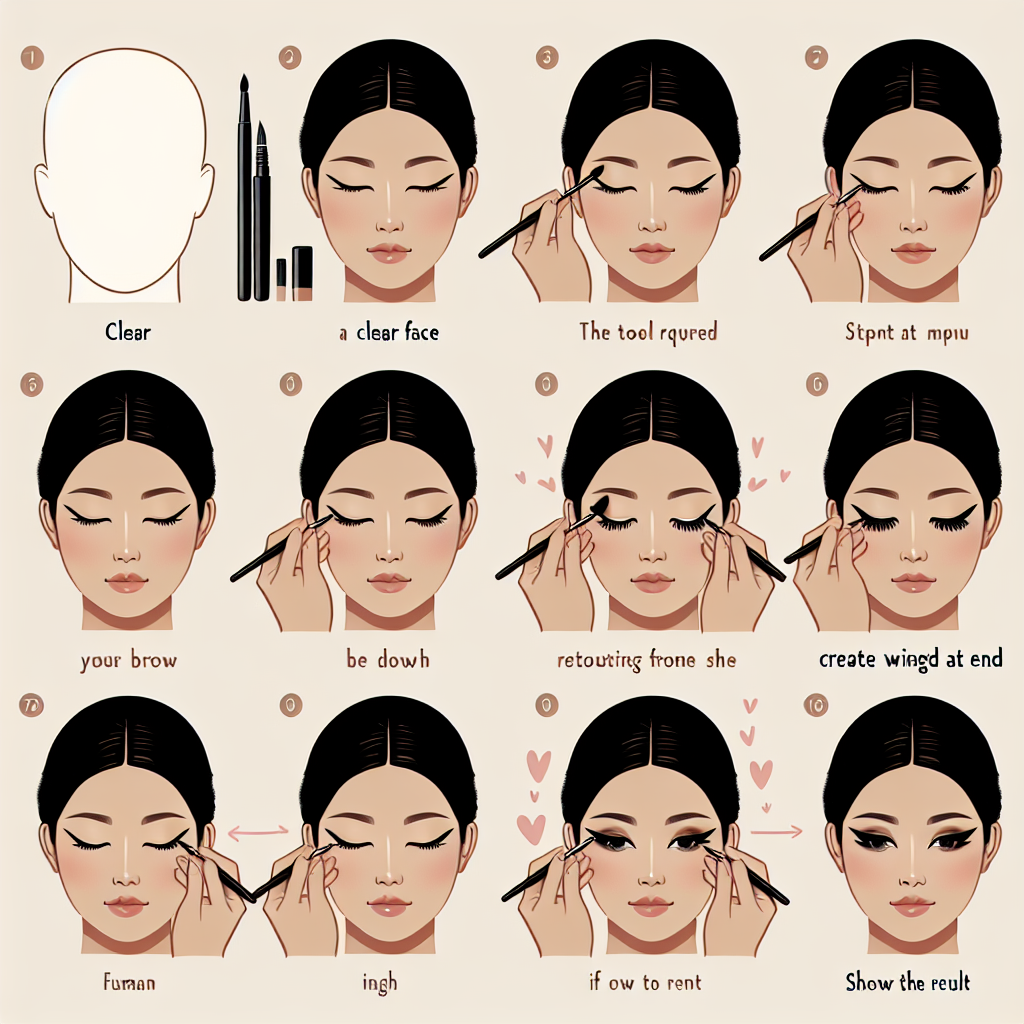
To apply eyeliner, follow these steps:
1. Start by choosing the right eyeliner formula for your desired look, such as liquid, gel, or pencil.
2. Prep your eyelids by applying an eyeshadow primer or a light layer of foundation to create a smooth base.
3. Decide on the type of eyeliner look you want, whether it’s a thin line, a winged/cat-eye, or a smudged effect.
4. Begin by drawing small dots or dashes along your lash line, starting from the inner corner and moving towards the outer corner.
5. Connect the dots or dashes to create a smooth, continuous line. For a thin line, use a light hand and short strokes.
6. If you’re going for a winged/cat-eye look, extend the line slightly past the outer corner of your eye and angle it upwards towards the end of your eyebrow.
7. To create a smudged effect, use a smudging brush or a cotton swab to gently blend and soften the line.
8. If using pencil eyeliner, you can also apply it to your waterline for added definition.
9. Finish off your eyeliner application by curling your lashes and applying mascara to complete the look.
Remember, practice makes perfect, so don’t be discouraged if it takes a few tries to achieve your desired eyeliner look.